- Published on
Using data from Adobe Analytics in Adobe Target Offers
- Authors
- Name
- Perpetua Digital
- john@perpetua.digital


Do social proof CTAs actually work?
I’m sure everyone has seen those popups on online stores that say something like “15 people are viewing this product right now!” or “105 other people from Michigan bought this yesterday!”. I actually looked around for one in the wild to include a screenshot, but of course, when I need one, I can’t find one. Anyway, I’m going to build one of those in Target that uses real data pulled from Adobe Analytics.

In this example, for simplicity, lets say I have a product page, running an A/B activity in Target for all visitors. 50% of visitors to this page will get a pop up that “encourages” them to make a purchase by saying something like: “n-number of people viewed this product yesterday!” and the other 50% of visitors will get the default experience of no such popup. The n-number used in the popup content will be a real number of unique visitors who viewed that product page yesterday just as it is reflected in an Adobe Analytics Workspace table. The number will change daily to reflect the previous day’s data relative to the current date; i.e. a visitor on the 12th will see data from the 11th, a visitor on the 13th will see data from the 12th, etc.
The example I create will be trivial, but concepts will apply to showing anything from a workspace table in a Target offer!
General overview
As with almost everything I write about these days, for the sake of brevity, I have to assume some prior knowledge of the Adobe Developer Console, some programming experience, and familiarity with Target and Adobe Analytics terminology.
Here are the steps:
- Hack together the popup element using a placeholder number.
- Save the code from above as a Target Offer. Note the offer ID after saving.
- Build the activity in Target with the 2 experiences using the form composer and set the delivery content in the variant experience to be the offer I just saved above.
- In workspace now, build a report that shows the number I want to display in the offer. Use the Oberon debugger to grab the parameters used to make that report as JSON.
- Setup a developer console project that has access to the Target API and the Adobe Analytics API. I will need the API keys in the next step.
- Write some NodeJS using the Adobe AIO libraries to pull that number from workspace and update your Target offer to use that number.
- Automate the NodeJS above to update the offer with new data every day (or however often you want it to update)
- Note: For this example lets assume its a desktop only audience. I would never willingly encourge anyone to put a popup on mobile!
Build the popup
Since I will be serving a chunk of HTML as my Target offer, I need a self contained, complete piece of code that builds the popup, styles it, etc. You could simplify this part by just replacing some static text like a headline or CTA, but I already said popup and my delete key is broken. I don’t remember the keyframes syntax for having things animate directionally in, so lets just have the popup fade in:
const popup = document.createElement('div');
popup.id = 'popup';
const content = document.createElement('p');
const keyframes = document.createElement('style');
keyframes.innerText =
  '#popup {font-weight: bold !important;height: 100px !important;width: 350px !important;background-color: #fff !important;border: 3px solid red !important;position: absolute !important;bottom: 0 !important;margin: 1em !important;padding: 1em !important;border-radius: 1em !important;-webkit-animation: popin 4s forwards !important;animation-name: popin 4s forwards !important;}@-webkit-keyframes popin {from {opacity: 0;}to {opacity: 1;}}@keyframes popup {from {opacity: 0;}to {opacity: 1;}}';
document.querySelector('head').insertAdjacentElement('beforeend', keyframes);
let message = 'n people viewed this product yesterday!';
content.innerText = message;
popup.appendChild(content);
document.querySelector('body').appendChild(popup);

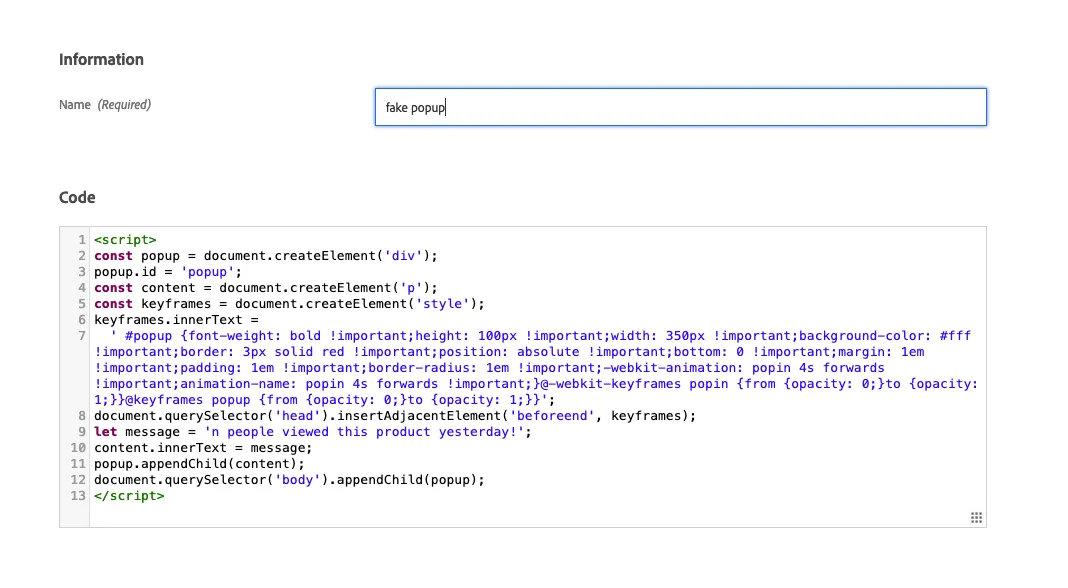
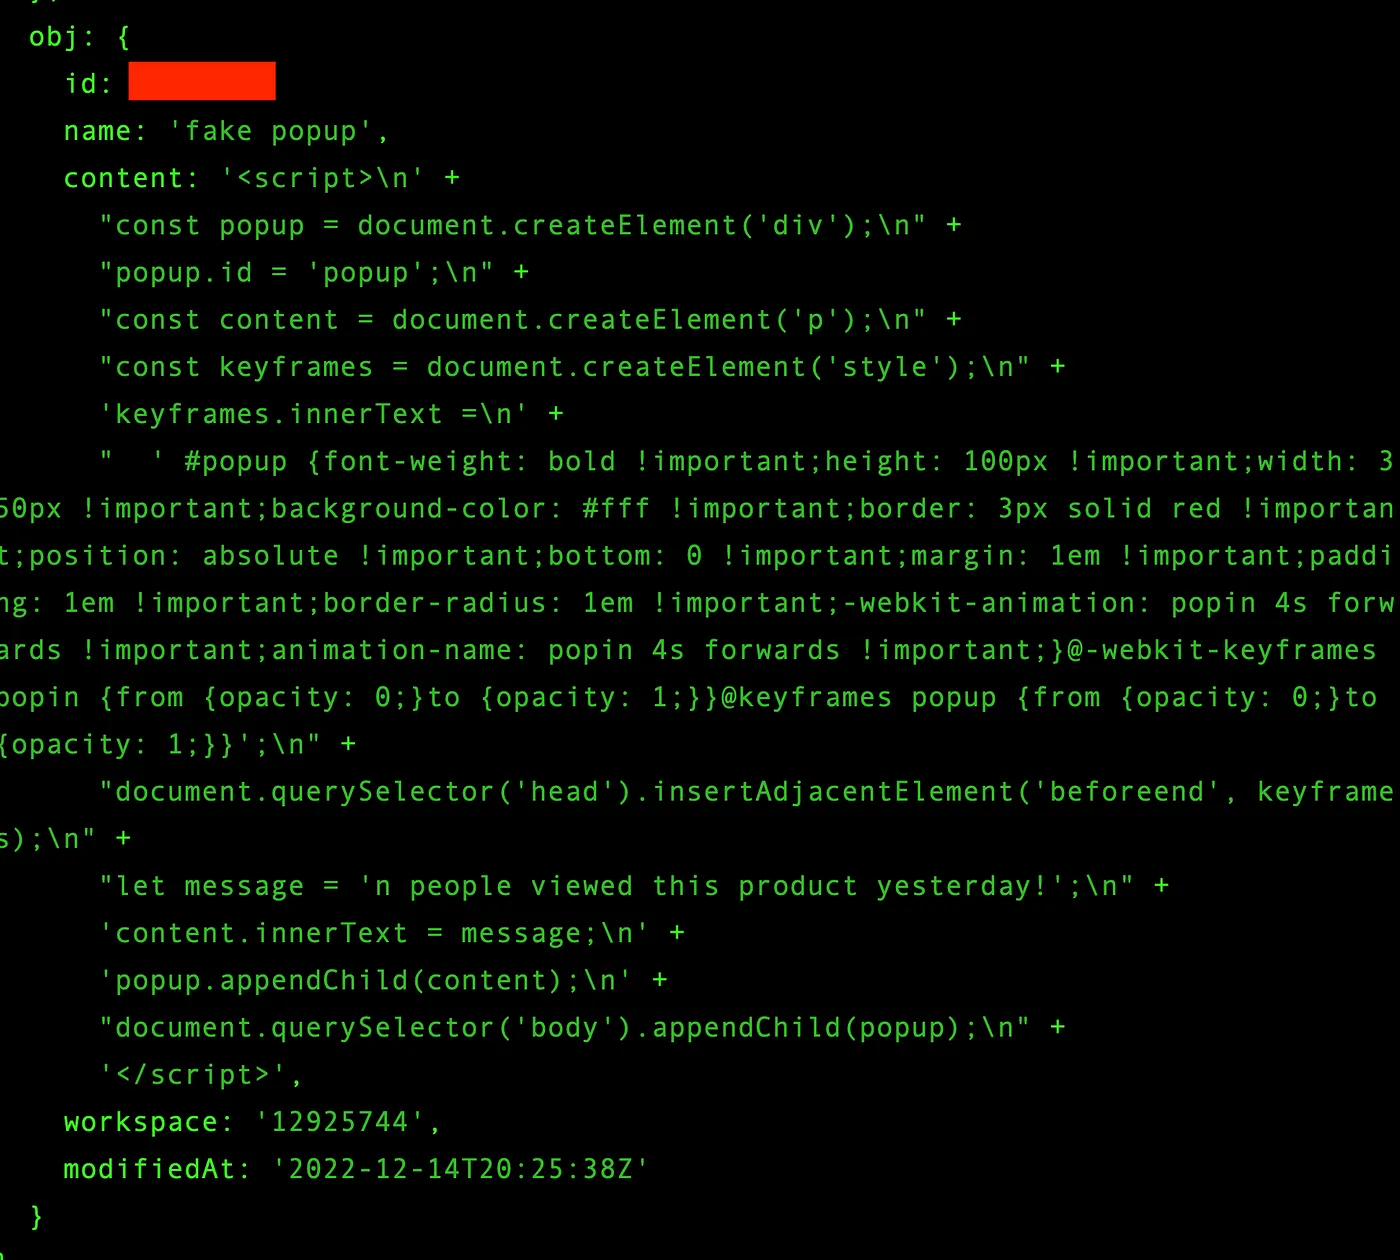
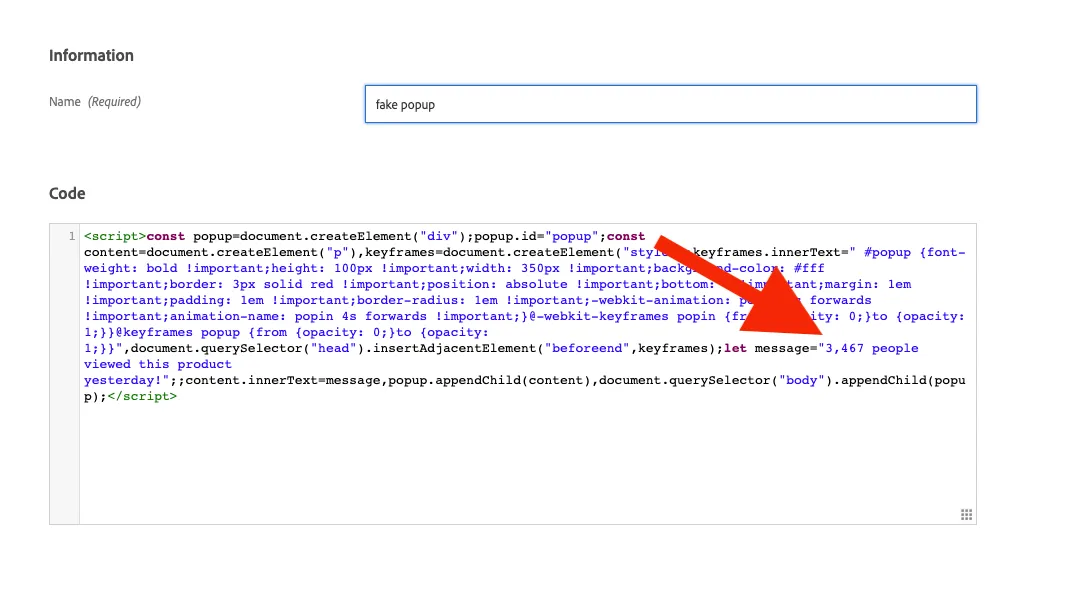
Save it as an offer
Now that I have the popup I want to serve in one of my Target experiences, I need to save it as an offer. Once it is saved as an offer, I will be able to deliver it in any Activity and more easily interact with it via the Target API.
Since I am technically delivering HTML in need to wrap this code in a <script> tag so it is valid HTML: 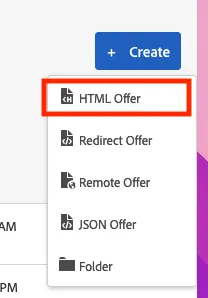
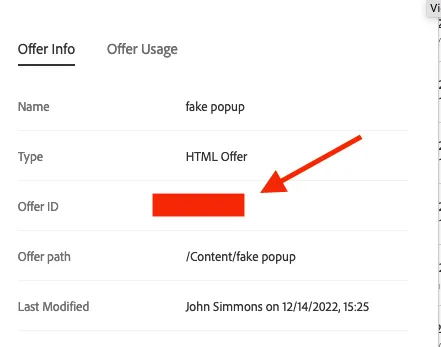
Once the offer is saved, bring up this info box by clicking the (i) icon in the modify column and save the Offer ID for later!
Build the Activity in Target
If you’ve never used the form composer, its a little difference than the VEC. You need to have all the specifics of your Activity ready to go. The official form composer docs are here.
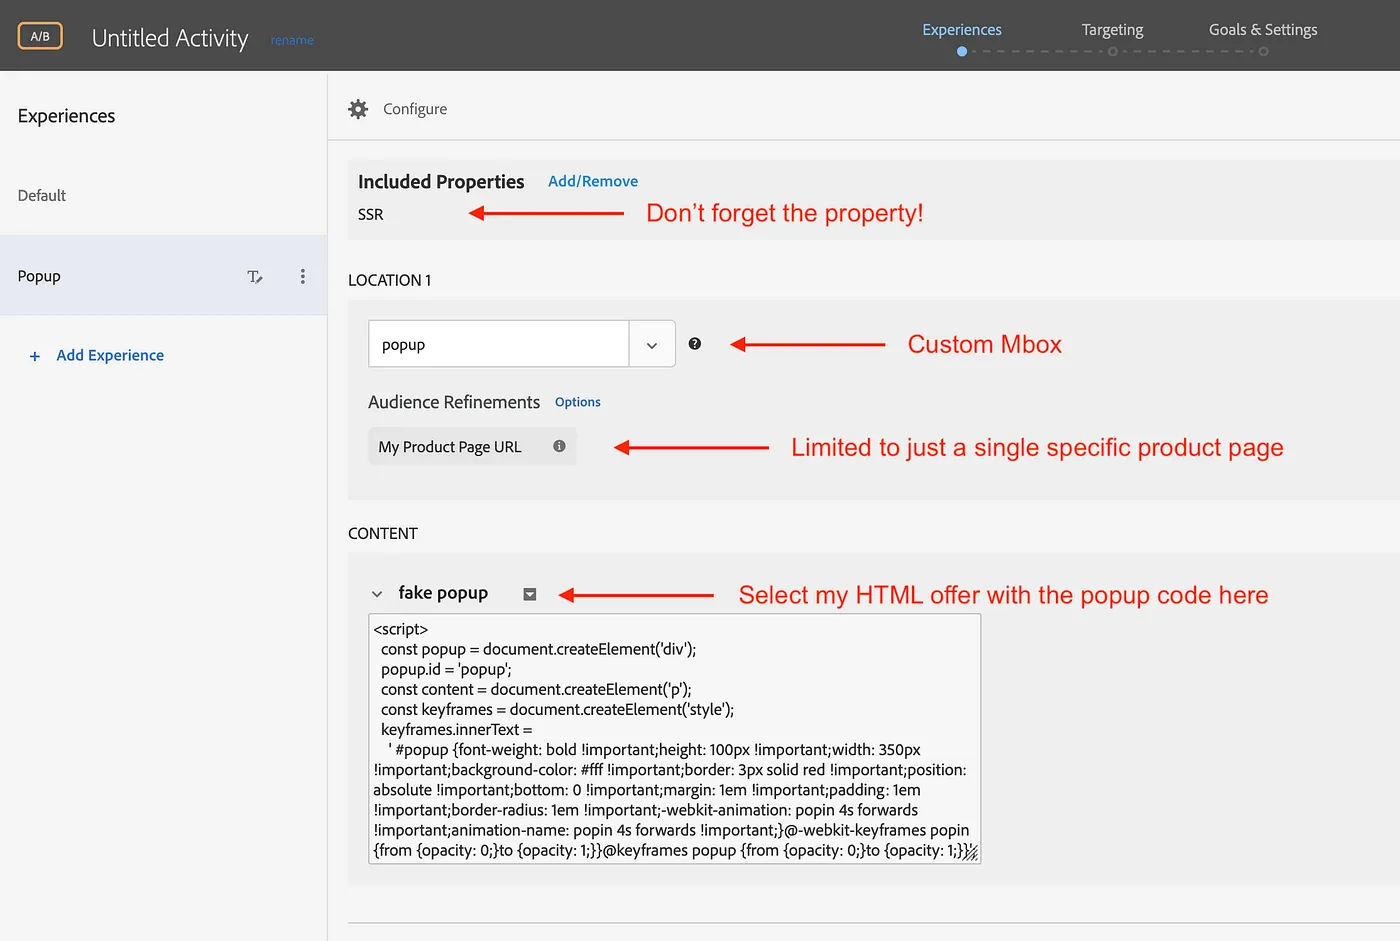
That’s it in the Target UI until its time to activate the test!
Getting the data I want to use in my Offer from Adobe Analytics
The first step to being able to pull the data I want via the API is to generate it from a report in workspace. While this is not technically necessary, Adobe’s Oberon debugging tool makes interacting with the reporting API much, much easier. Here’s what my desired data looks like in workspace, the number of unique visitors to my product page yesterday:
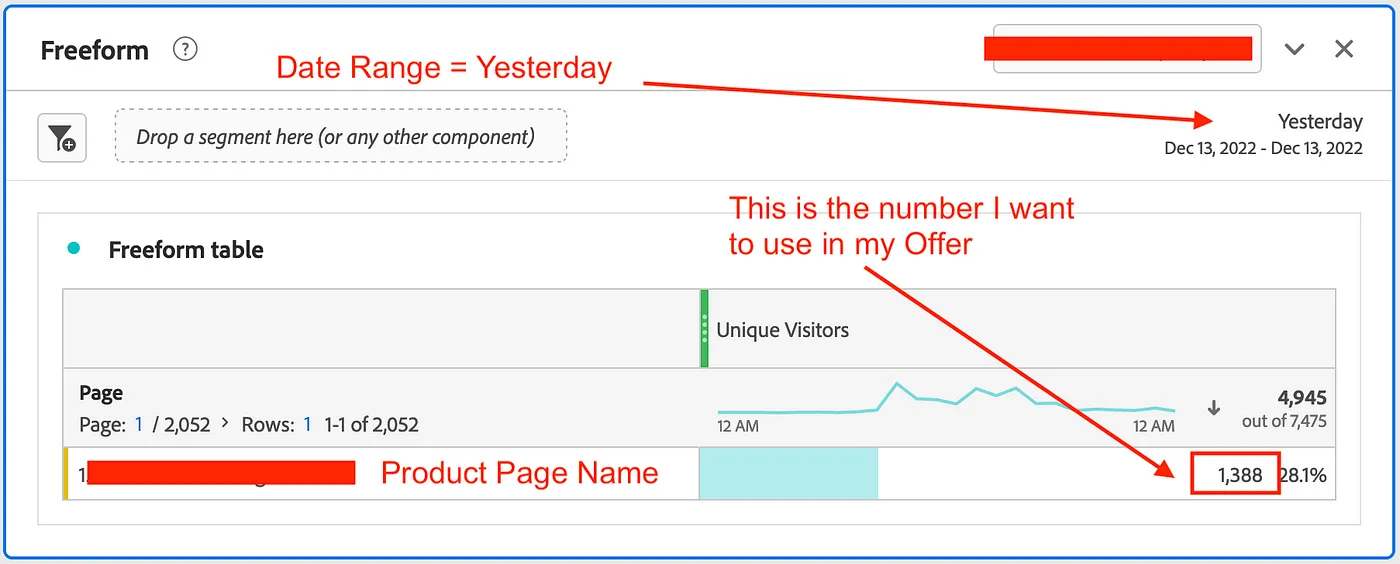
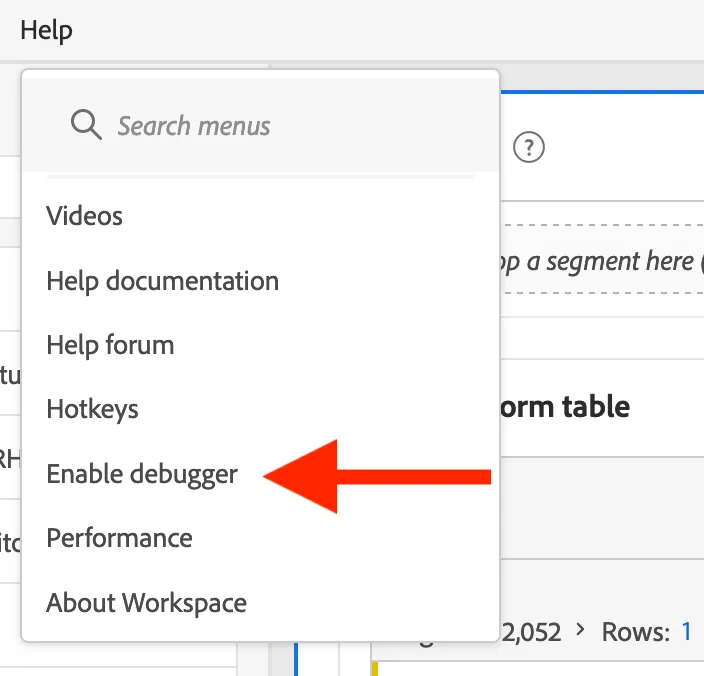
In order to view (and steal) the underlying API query that made this report, I need to first enable the debugger. To do so, make sure the project is saved and go to Help > Enable Debugger. Enabling the debugger will add this little bug guy to your freeform tables. Click it, and you can see the underlying JSON & XML queries the Adobe Analytics API used to generate the data for the table. Depending on how much work you have done on the table, you will also see historical snapshots of queries it has used.

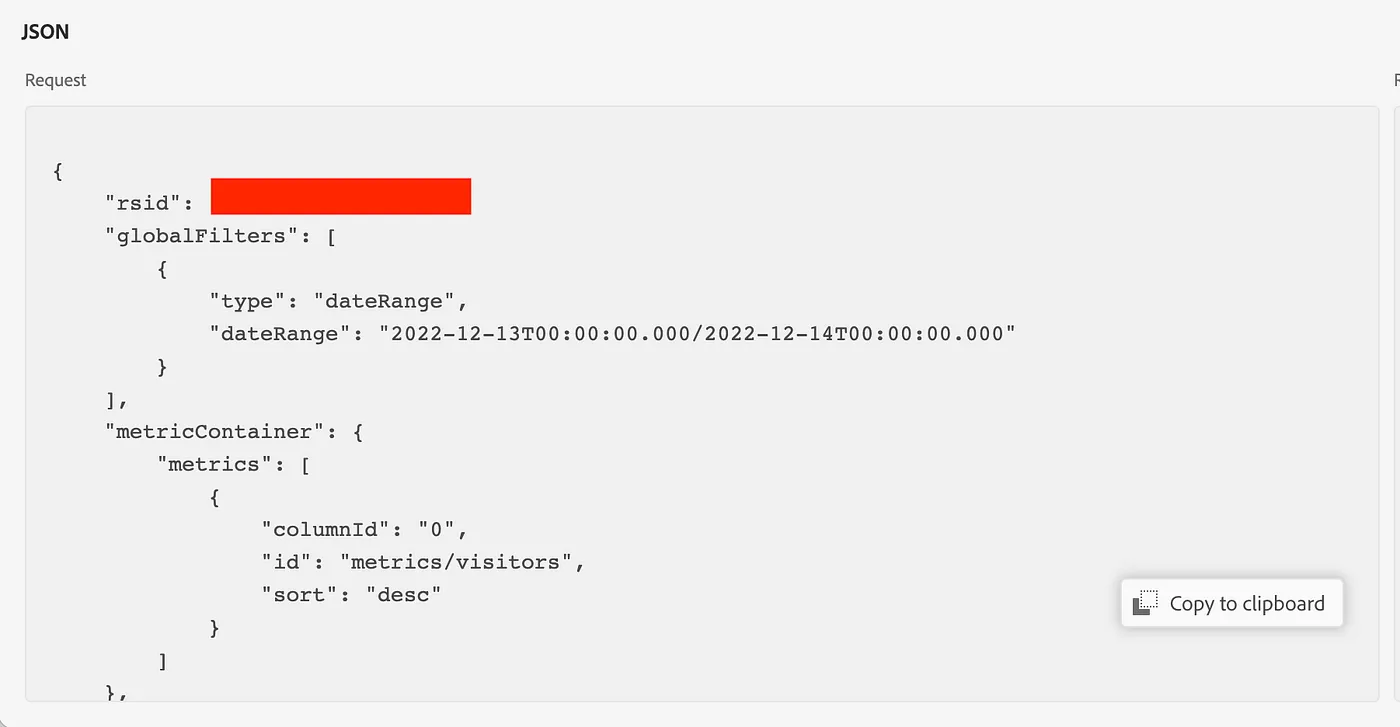
This is what I am looking for inside the debug view. I will use this chunk of JSON later on when I need to programmatically pull this data.
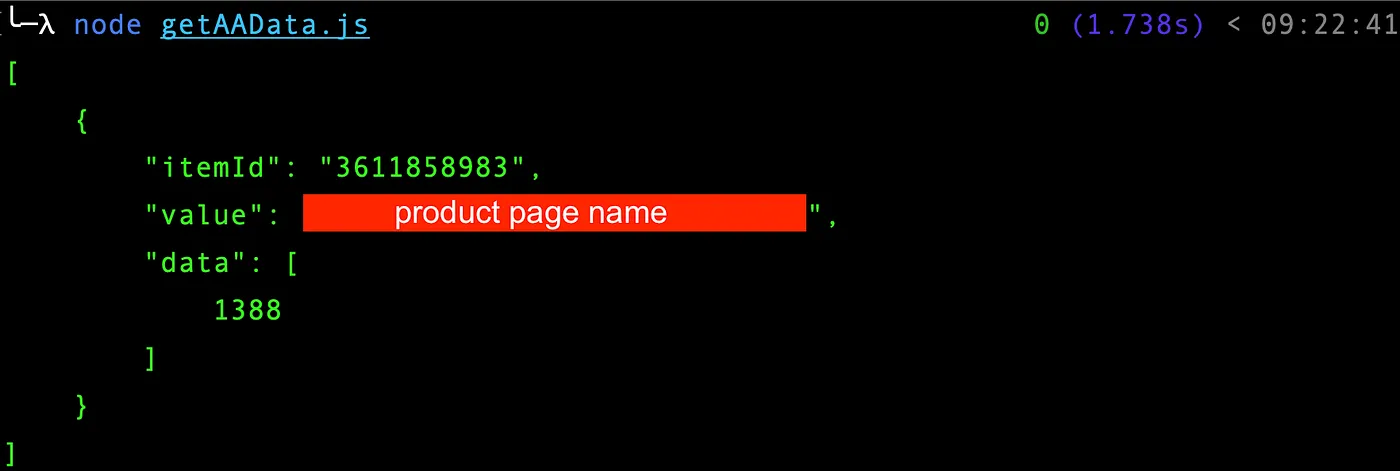
Jumping ahead a little bit, when I make this call via the Node SDK, you can see that the data is the same as in workspace. That is because I am doing the exact same thing workspace is doing!
const auth = require('@adobe/jwt-auth');
const aaSDK = require('@adobe/aio-lib-analytics');
const dotenv = require('dotenv');

// get my env variables
dotenv.config();

// Adobe API Config vars
const config = {
  clientId: process.env.clientId,
  clientSecret: process.env.clientSecret,
  technicalAccountId: process.env.technicalAccountId,
  orgId: process.env.orgId,
  metaScopes: ['ent_analytics_bulk_ingest_sdk'],
  privateKey: process.env.privateKey.replace(/\\n/g, '\n'), // make the PK readable as a string
};

// json query goes here, I left it out here to save space
const query = {}


async function getAAData() {
  // get bearer token
  let { access_token } = await auth(config);

  //initialize sdk
  const aaClient = await aaSDK.init(process.env.companyId, config.clientId, access_token);

  // Query the data
  const myReport = await aaClient.getReport(query);

  console.log(JSON.stringify(myReport.obj.rows, null, 4));
}

getAAData();
Making the query dynamic
In order to make my query dynamic and return the data from the previous day, I need to inject the previous date into it. Although the workspace date range says “Yesterday”, in the query you can see it uses actual dates instead of a keyword:
globalFilters: [
    {
      type: 'dateRange',
      dateRange: '2022-12-13T00:00:00.000/2022-12-14T00:00:00.000',
    },
  ],
This is good though, because that means I can just replace the hardcoded dates with whatever date range I want. In this case, the dates of “today” and “yesterday”
const today = new Date();
const todayDate = today.toISOString().split('T')[0];
const yesterday = today.setDate(today.getDate() - 1);
const yesterdayDate = new Date(yesterday).toISOString().split('T')[0];
const query = {
 rsid: process.env.rsid,
 globalFilters: [
   {
     type: 'dateRange',
     dateRange: `${yesterdayDate}T00:00:00.000/${todayDate}T00:00:00.000`,
   },
 ],
}
 etc etc .........
There’s probably a more elegant way to do this way a newer date library from NPM, but this works. So now my report will always pull the previous day’s data, relative to the current date. Exactly the data I want to use in my dynamic offer.
A note when automating: make sure you know the timezone of your server! Dates might be different if its using UTC.

Updating the offer
Now that I can get the data I need from Adobe Analytics. I want to take that data and put it into my offer programmatically. To do this, I can use the Target AIO Library to get the offer, replace the data, and update it. First lets get the offer:
const auth = require('@adobe/jwt-auth');
const dotenv = require('dotenv');
const targetSDK = require('@adobe/aio-lib-target');

// get my env variables
dotenv.config();

// Adobe API Config vars
const config = {
 clientId: process.env.clientId,
 clientSecret: process.env.clientSecret,
 technicalAccountId: process.env.technicalAccountId,
 orgId: process.env.orgId,
 metaScopes: ['ent_analytics_bulk_ingest_sdk', 'ent_marketing_sdk'],
 privateKey: process.env.privateKey.replace(/\\n/g, '\n'), // make the PK readable as a string
};

async function getTargetOffer() {
 let { access_token } = await auth(config);
 const targetClient = await targetSDK.init(process.env.tenant, config.clientId, access_token);
 const offer = await targetClient.getOfferById(123456); // fake offer number
 console.log(offer);
}

getTargetOffer();
The contents of the offer (aka the code) can be found in the response under obj.content. I will be calling this offer, getting its current content, replacing the number that is currently in the message with the latest one from workspace, then calling the update function to update the content.
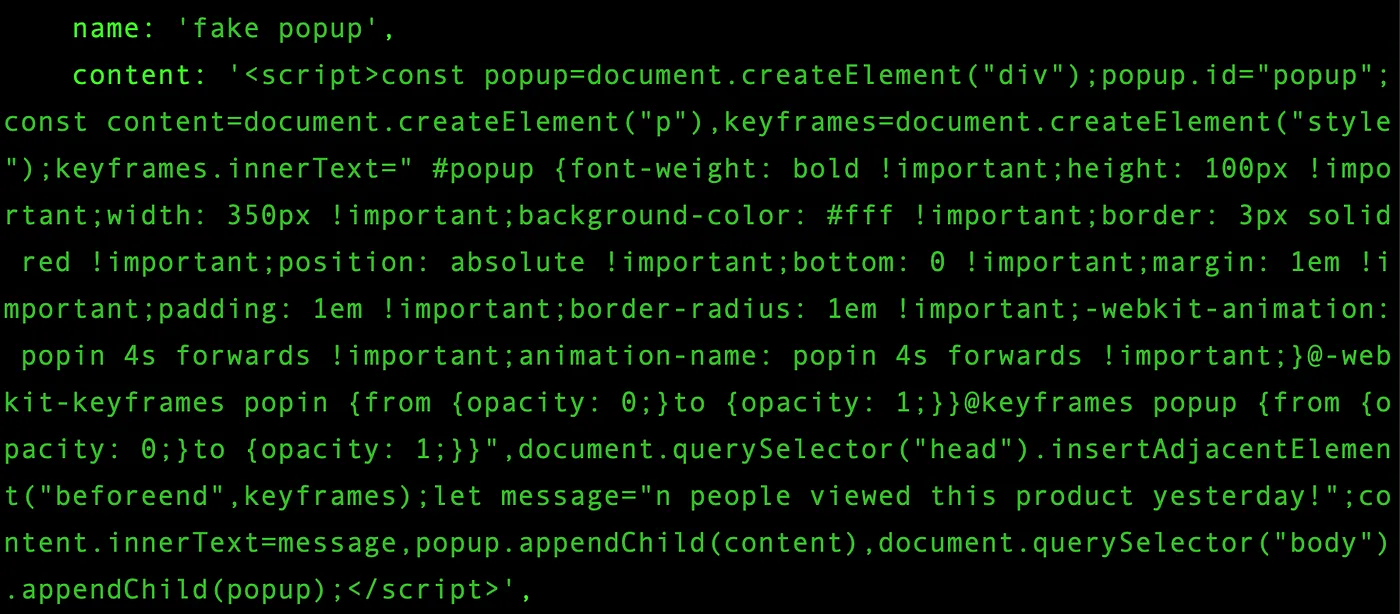
There’s a couple ways to do this, but the easiest is probably regex replace. The tricky part here is the content gets returned as a bunch of concatenated strings because Target is keeping the spacing that was present when I originally saved the offer. To make things a little easier on myself, I’m going to go open my offer in the Target UI, grab the code, and minify it. Then when I use the API, the offer content gets returned to me as a single string which I can use regex replace on:
async function getTargetOffer() {
let { access_token } = await auth(config);
const targetClient = await targetSDK.init(process.env.tenant, config.clientId, access_token);
const offer = await targetClient.getOfferById(123456); // not the real offer ID
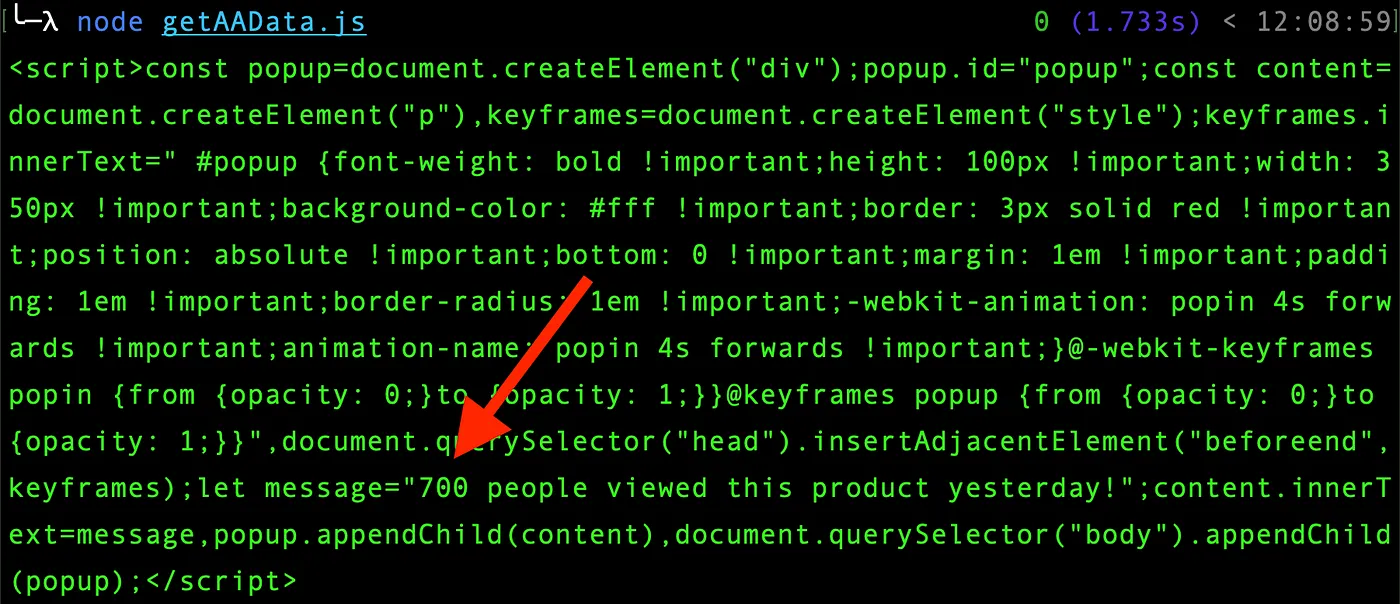
let currentOfferContent = offer.obj.content;
// Im using "700" here just for illustrative purposes
let updatedOfferContent = currentOfferContent.replace(
'let message="n people viewed this product yesterday!";',
`let message="700 people viewed this product yesterday!";`
);
console.log(updatedOfferContent);
}
So now that I have my updated offer content (the exact same offer code with just that number changed), I can call the updateOffer method with this new content.
const updateOffer = await targetClient.updateOffer(123456, { name: offer.obj.name, content: updatedOfferContent });
When using Target APIs, the UI is often slow to update. So if I were to go check in the offers UI I’d likely still see “n” instead of “700”. However, the delivery API uses the newest version when serving activities so the change would take effect almost immediately.

Putting it all together...
So now lets put it all together. Call Adobe Analytics for the data from yesterday, extract that number, and update the Target offer with that new number:
const auth = require('@adobe/jwt-auth');
const dotenv = require('dotenv');
const targetSDK = require('@adobe/aio-lib-target');
const aaSDK = require('@adobe/aio-lib-analytics');
// get my env variables
dotenv.config();
// Adobe API Config vars
const config = {
clientId: process.env.clientId,
clientSecret: process.env.clientSecret,
technicalAccountId: process.env.technicalAccountId,
orgId: process.env.orgId,
metaScopes: ['ent_analytics_bulk_ingest_sdk', 'ent_marketing_sdk'],
privateKey: process.env.privateKey.replace(/\\n/g, '\n'), // make the PK readable as a string
};
const today = new Date();
const todayDate = today.toISOString().split('T')[0];
const yesterday = today.setDate(today.getDate() - 1);
const yesterdayDate = new Date(yesterday).toISOString().split('T')[0];
// the query is truncated here, it may be longer in actuality
const query = {
rsid: process.env.rsid,
globalFilters: [
{
type: 'dateRange',
dateRange: `${yesterdayDate}T00:00:00.000/${todayDate}T00:00:00.000`,
},
],
metricContainer: {
metrics: [
{
columnId: '0',
id: 'metrics/visitors',
sort: 'desc',
},
],
},
dimension: 'variables/page',
// etc
// etc
}
async function getAAData() {
// get bearer token
let { access_token } = await auth(config);
//initialize sdk
const aaClient = await aaSDK.init(process.env.companyId, config.clientId, access_token);
// Query the data
const myReport = await aaClient.getReport(query);
let { rows } = myReport.obj;
// the first number in the first data row
let number = rows[0].data.pop();
return number;
}
async function updateTargetOffer() {
let { access_token } = await auth(config);
const targetClient = await targetSDK.init(process.env.tenant, config.clientId, access_token);
const offer = await targetClient.getOfferById(process.env.offerID); // not the real offer ID
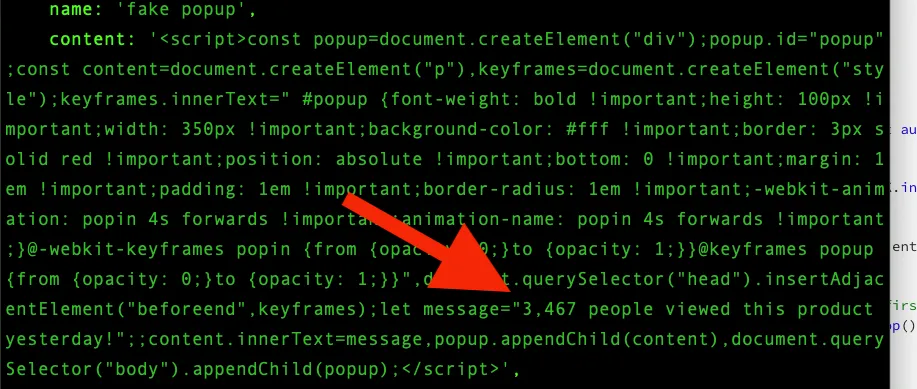
const number = await getAAData();
let currentOfferContent = offer.obj.content;
let updatedOfferContent = currentOfferContent.replace(
/let message=".+ people viewed this product yesterday!"/g,
`let message="${number.toLocaleString('en-us')} people viewed this product yesterday!";`
);
const updateOffer = await targetClient.updateOffer(process.env.offerID, { name: offer.obj.name, content: updatedOfferContent });
return updateOffer;
}
updateTargetOffer();
A few things to call out in the code above:
- Metascopes in the configuration; In addition to API setup in the developer console, you have to make sure you are using the correct metascopes in your API calls. More on metascopes here.
- The regex replacement for the message content is intentionally vague to account for punctuation in number formatting. Also, it is an actual regex now because after the first run, the message will have a number in it instead of “n”
- The number string uses USA style formatting using the toLocaleString method. It would be cool to dynamically set this with Target geo profiling somehow…
- Calling updateOffer requires the offer name for some reason even though you are already sending the ID…
- I moved the offer ID to an environment variable to make this code more reusable. You could also move it to a command line argument.

Automation & Conclusion
In order for this setup actually useful, it needs to be automated to run every day so that the offer always shows the previous day’s data. Since the activity just serves the offer, there is no need to touch the activity once it is activated. It will just serve the latest version of the offer whatever that happens to be.
There are a few options for automating the offer update code daily. A cron job on a linux virtual machine or via an AWS Lambda with AWS Event Bridge are the two most obvious choices. There are plently of resources out there to help you learn about those!
Following all the steps above and putting the code into an automation process will allow you to run a Target experience that shows an offer that shows real data!